Configuring enforced Outboud TLS policy on Exchange Online / Office 365
There might be times when you need to enforce certain policies in your email communication. For example you might be dealing with a customer/partner that requires enforced TLS communication between your mail servers.
The aim if this article is to provide you guidance how you can set up this kind of policies on Microsoft’s Hosted Exchange / Office 365.
To start you will need top log in to Office 365 portal using one of your accounts that have administrator permissions. On the home screen of the portal under the Microsoft Office 365 – Exchange heading you can find a link for advanced Exchange management portal.
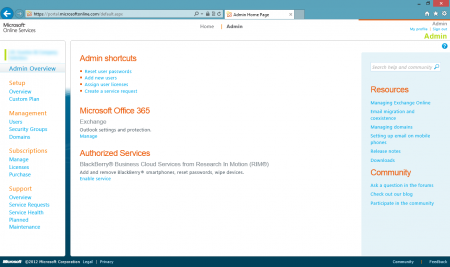
Following the Manage link you will be presented with another for Exchange management. On the left side you will have the options to manage various aspects of Exchange. In our scenario we are interested in Mail Control.
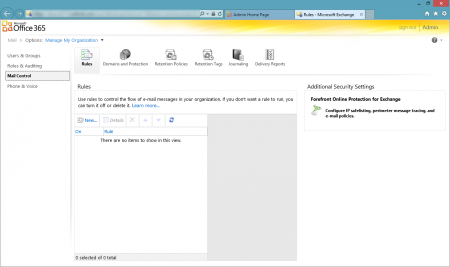
On the right hand side you will see yet another link for Microsoft Forefront Online Protection for Exchange (FOPE). Click this link to open FOPE console.
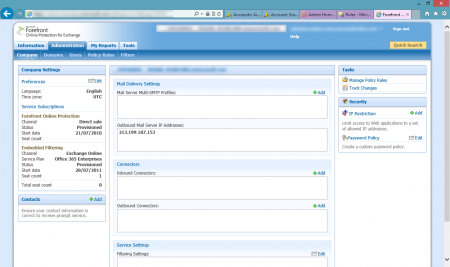
FOPE will allow you to setup advanced security/protection features for your Office 365 Exchange. You can apply these settings to the whole company or just individual domains. In this example we will be applying these setting for the whole company. To setup an enforced outbound TLS policy, we need to add a new Outbound Connector. To setup the new connector, click on Add next to the list of Outbound Connectors in the Connectors section.
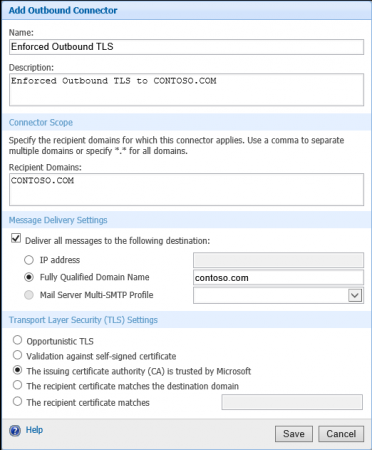
Provide a name for your new connector, give it a description if required. Next you need to add the domain of the other party. If you need to add multiple domains, you can separate the with a comma. Than you need to specify where do you want to deliver the messages for the above domains. Most likely options would be an IP address or using the MX records by specifying the Fully qualified domain name. Last setting is for the TLS security settings. Since we want to enforce TLS communication, Opportunistic TLS is out of the question. You will need to choose from the remaining options depending on the each particular case. In our example we opted for the issuing CA is trusted by Microsoft. After checking all the settings, we can save the outbound connector.
Initially the connector is setup, but not enforced. To enforce the selected connector, click on the Enforce link next to it.
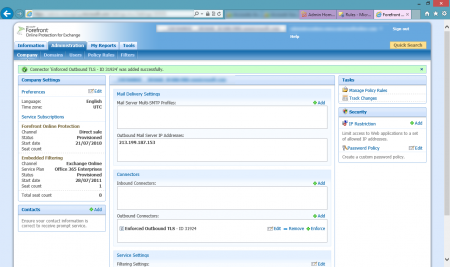
You will get a notification/warning that this connector will enforce the association with all domains within your company. Just click OK to confirm and your outbound enforced TLS communication is good to go.

To confirm correct functioning if the connector, send a test email to the destination domain, and you should see a record of this emails using the outbound connector in the logs (under the Tools tab).