How i virtualized my physical Windows Home Server 2011
The more i was working with Microsoft’s latest Windows Server incarnation, the more i was thinking about using the free Hyper-V Server 2012 to virtualize my Windows Home Server 2011. One of the main reason was the use of Storage Spaces, which was allegedly done by the same guy who did the Drive Extender in the previous version of WHS.
There were many aspects of this project that didn’t go quite according to plan. It caused a few headaches, brought me to the brink of giving up, but i kept trying and got my reward. It helped me to learn a lot of new stuff (Powershell rules!) and now I have my WHS 2011 running on Hyper-V server 2012, just the way i wanted to.
I started with installing the Hyper-V server on a spare disk, just to be safe and make sure i can go back any time to my original setup (what a clever move this was). The installation was pretty quick and i have been presented with the basic text based Server Configuration menu.
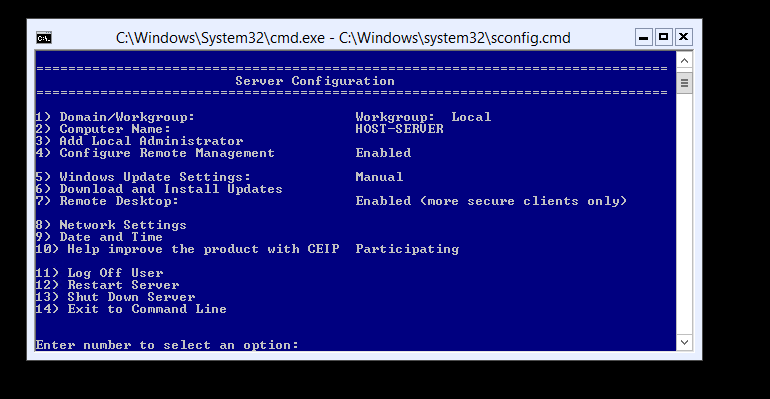
Setting up the network configuration and enabling remote management and remote desktop seemed to be easy – just a matter of selecting the items from the menu. Following was the next step, configuring my Windows 8 workstation for remote management. And here’s where the fun started.
Installing Remote Server Administration Tools
So what you normally do is you open the search engine of your choice, type in Remote Server Administration Tools download and off you go. Download, Save, Run, and . . . RSAT is nowhere to be found. Not so simple than after all! Or at least not in my case.

The problem is the localization used. If you read carefully the text on the download page, under System Requirements you can find information that RSAT supports a list of languages, and if yours is not on the list, you are provided with a KB article on how to install it.
Virtualizing the disks
Next step was converting the data on the physical disks to VHDs. First i tried to run Sysinternals Disk2VHD, which created the VHD files, but when i tried to boot the VM from this, i was getting a BSOD. I though this might be related to the fact i was using dynamic disks on my physical server. I also tried to run a windows backup and restore that to the VM, but with a similar (no) result.
Just to convince myself i haven’t gone mad, i tried to install WHS from scratch, which worked fine. So i went back to do some more research. After some time a hit the jackpot. Came across a Microsoft Technet Forum post, where a poster called Mali Stane pointed to Mark Minasi’s Forum, where a user called RKOET provided the solution i was looking for. It involved offline editing the registry, but once implemented, my virtual WHS finally booted fine.

Server management
As mentioned at the beginning of the post, configuring remote management of the Hyper-V server seemed to be simple. Had i known before i started…
There are different approaches depending on whether the server and management workstation are in domain or workgroup, and so on. And since i’m not using a domain controller at home, the idea is to enable management on the hyper-v server, create a user account with same user name and password as the management workstation. For a base guide to configure remote management i used this MSDN Blog Post.
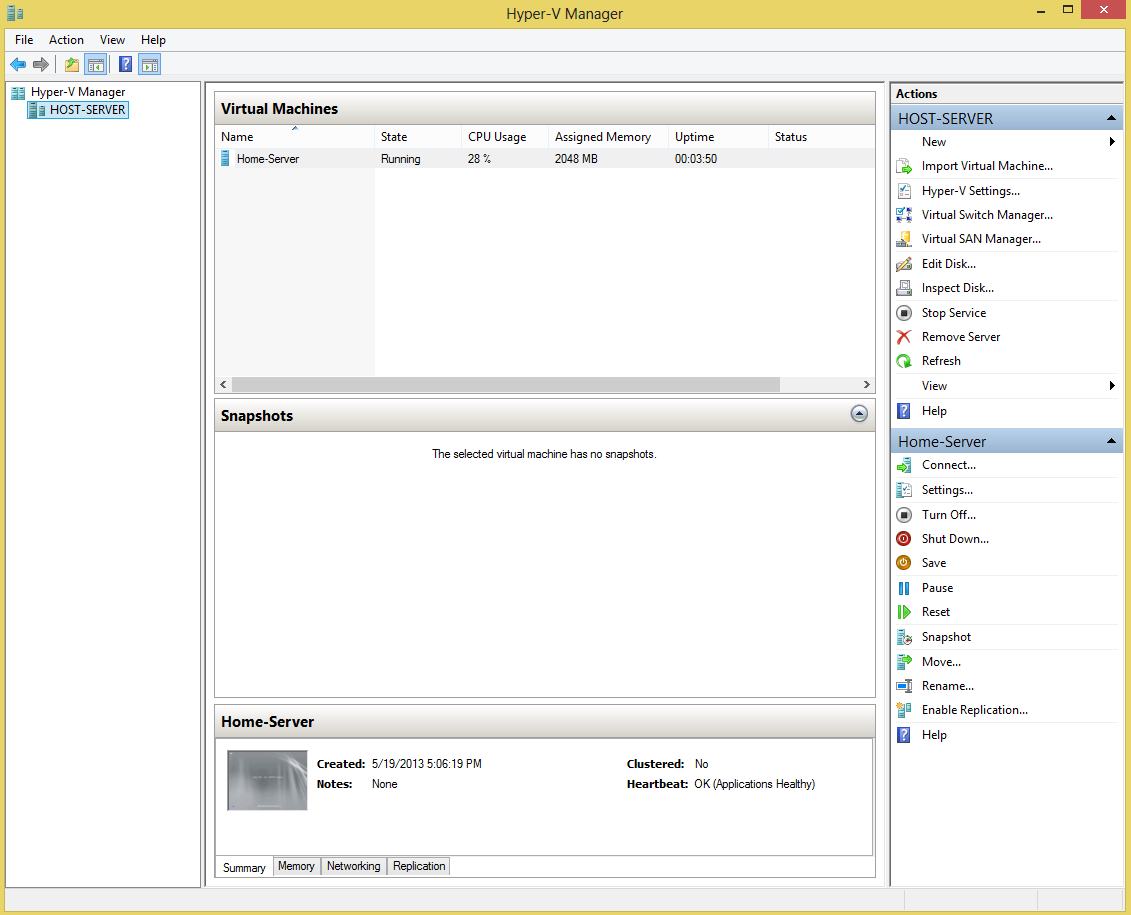
An important note here on user accounts. I had my workstations setup using my Microsoft Account. It took a while to realize that you need to use a proper local account. Once i did that, i gained a basic management access to the hyper-v server – powershell, event logs, VMM.
For read-only access to Device manager i had to use a reg key edit:
> reg add HKLM\Software\Policies\Microsoft\Windows\DeviceInstall\Settings /v AllowRemoteRPC /t reg_dword /d 1
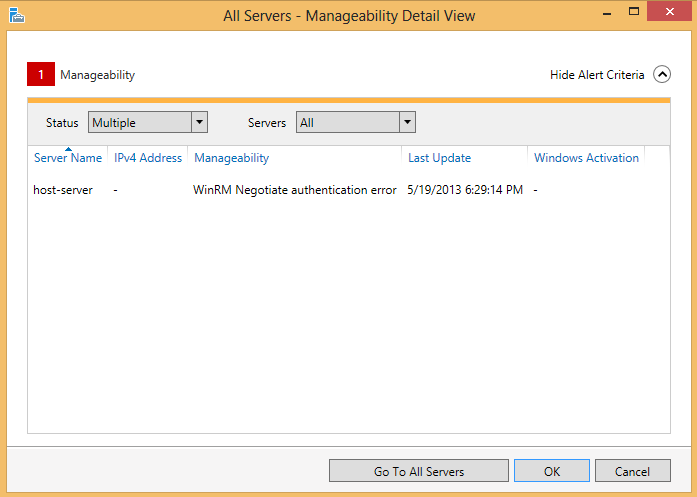
Next step was to try and use the Server Management from the Windows 8 desktop. I tried to add the server using its DNS name, but no matter what i tried, i’m still getting a WinRM Negotiate Authentication error, which i haven’t been able to resolve so far.
Managing Disks
When i tried to open disk management, i was shown a nasty error message, but his has a solution as well – i had to open the Remote Volume Management rule on the Hyper-V server’s firewall:
> netsh advfirewall firewall set rule group="Remote Volume Management" new enable=yes
Again, for full details you can have a full read on this Microsoft Technet forum.

Once i got this sorted, i realized that managing the disks this was isn’t quite the same as doing these tasks directly on the server. I found that when i made an action, the status of the disks haven’t refreshed – i had to keep closing and opening the MMC window to see the new status. As an alternative i used RDP to the Hyper-V server and DISKPART in the command line. This gave a bit more responsive results, but still didn’t feel quite right. Finally i started to use Powershell (ISE). This provided all the tools i needed for managing the drives, volumes, storage pools, etc.
Now if you say Hyper-V Server has no Powershell ISE, i’ll fully agree. But you have Powershell ISE on your Windows 8 computer or Server 2012 with GUI. You can connect to remote server using the command:
> Enter-PSSession -ComputerName ServerName

Than i used Terry L@u’s Blog post to get the basic idea on creating a storage pool and provision virtual drives on this pool and started to play around with these commands to achieve my goal.
For a bit of HW background, i had two 2TB drives and one 1TB drive. I needed some resilient storage for data i need to have safe – documents, pictures, home videos, that kind of stuff. Than i needed some (as big as possible) storage for the files i’m not that worried about – music, movies, installers, and such.
After lot of going back and forth, some unsuccessful attempts, i came up with a solution of creating a parity drive of taling up just above 900GB of each of the 3 drives, giving me in the region of 1.8TB space. To achieve this, i used this powershell command:
> New-VirtualDisk -StoragePoolFriendlyName MyStoragePool -FriendlyName MyParityDisk -ResiliencySettingName Parity -ProvisioningType Fixed -UseMaximumSize
Than i created a simple volume from the remaining space on the 2TB drives using this command:
> New-VirtualDisk -StoragePoolFriendlyName MyStoragePool -FriendlyName MySimpleDisk -ResiliencySettingName Simple -ProvisioningType Fixed -UseMaximumSize -NumberOfColumns 2
The one difference is the -NumberOfColumns switch which i used to specify i only want to use the space on the 2 TB drives – otherwise it created a tiny drive since it was also trying to use the small remaining space on the 1TB drive.
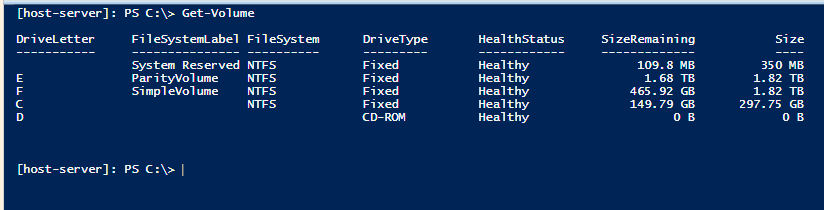
Once i had the volumes created, a created new VHDX files on each of the volumes that i than mounted to my virtual WHS for use. To check the current usage of the storage pool volumes i just run get-volume command.
Conclusion
This has been quite a journey for me. I have to say that with this experience my view on Powershell has completely changed. This was the tool that ultimately allowed me to reach my goal. I’m a bit disappointed the Server Manager is not working yet. I’ll certainly come back to this problem in the future, but since it took quite a while to get to this point, i want to give it a little rest.
The other note i have is what i came across on some posts in relation to the performance of Parity volumes on Storage Pools. You can find plethora of posts complaining that the write performance of this type of volume keeps jumping up and down. I can confirm this finding, even though i’m not too worried since the data on this volume will be static and there will bee little new data. The performance of Simple volume was much more constant.
All in all, this was a great exercise and i’ll surely report back if i find the solution to that dreaded WinRM problem.